Start Your Concrete Project Today!
Master the Essentials of Site Prep, Mixing, and Finishing
Prepare Your Foundation: Site Assessment and Material Selection
The quality of your finished slab depends heavily on the groundwork you complete before any concrete arrives. Begin by marking the exact dimensions of your project using stakes and string, ensuring corners form true 90-degree angles by applying the 3-4-5 triangle method. Measure three feet along one side, four feet along the adjacent side, and confirm the diagonal measures exactly five feet.
Excavate the marked area to a depth that accommodates your slab thickness plus a four-inch gravel base. In Johnstown and surrounding Ohio communities, soil composition varies from clay-heavy areas that retain moisture to sandier profiles with better natural drainage. Test your soil by digging a small pilot hole after rainfall. If water pools for more than a few hours, you may need to increase base depth or install drainage solutions. Clay-rich soils common to central Ohio require extra attention to prevent frost heaving during winter months.
Gather your materials before starting: Portland cement (or pre-mixed bags for smaller projects), graded gravel, reinforcing wire mesh or rebar, lumber for forms (2×4 or 2×6 depending on slab thickness), stakes, and a tamper or plate compactor. For a standard 10×10 patio installation, budget approximately 2.5 cubic yards of concrete. Always order 10 percent more than calculated volume to account for spillage and uneven subgrade.
Build Formwork That Holds: Securing Forms and Compacting Your Base
Formwork acts as the mold that shapes your slab and must withstand the lateral pressure of wet concrete without bowing or shifting. Cut straight lumber to match your project dimensions, then drive stakes every three feet along the outside of the boards. The top edge of your forms establishes the finished height of your slab, so use a four-foot level and straightedge to ensure perfect alignment across the entire perimeter. For walkway installation or longer runs, check for proper slope to direct water away from structures at a minimum grade of one-quarter inch per foot.
Secure forms by driving 16-penny nails or three-inch screws through stakes into the boards. Double-check that forms remain plumb and level after fastening. Any movement during the pour creates uneven surfaces that require grinding or patching later. Apply a thin coat of form release oil to interior faces to simplify removal once concrete cures.
Spread your gravel base in two-inch lifts, compacting each layer thoroughly before adding the next. Rental plate compactors work best for areas larger than 100 square feet, while hand tampers suffice for smaller projects. In Ohio’s freeze-thaw climate, a well-compacted four-inch base prevents cracking by providing stable support and drainage. Moisture that freezes beneath slabs creates hydraulic pressure capable of lifting and fracturing concrete, a common issue in this region during late winter and early spring temperature swings.
Mix and Pour With Precision: Achieving Consistent Concrete Strength
Select concrete with the appropriate compressive strength for your application. Standard patio installation and walkway projects perform well with 3,000 PSI mix, while concrete driveway contractors typically specify 4,000 PSI for vehicular loads. If you choose bagged mix, a standard 60-pound bag yields approximately 0.45 cubic feet, meaning you need roughly 133 bags for a four-inch-thick 10×10 slab. For projects exceeding two cubic yards, ordering ready-mix concrete from a local supplier proves more cost-effective and ensures consistent quality.
When mixing by hand or with a portable mixer, add water gradually. The ideal consistency resembles thick oatmeal: wet enough to flow and fill voids, but not so soupy that aggregate separates. Excess water weakens the final product and increases surface cracking. Aim for a slump test result between three and four inches for standard flatwork.
Pour concrete into forms starting at the farthest corner from your access point, working backward toward the exit. Use a square shovel or rake to spread material evenly, slightly overfilling forms. As you pour, insert a spade or vibrating tool along form edges to eliminate air pockets that create voids and weak spots. Place reinforcing mesh or rebar in the lower third of slab depth, using small chairs or dobies to suspend steel off the base. This reinforcement distributes tensile stress and prevents cracking from settling or thermal expansion. Schedule pours during moderate temperatures between 50 and 80 degrees Fahrenheit. Johnstown’s spring and fall months offer ideal conditions, while midsummer heat accelerates curing and winter cold prevents proper hydration.
Finish and Cure for Lasting Durability: Surface Techniques and Timelines
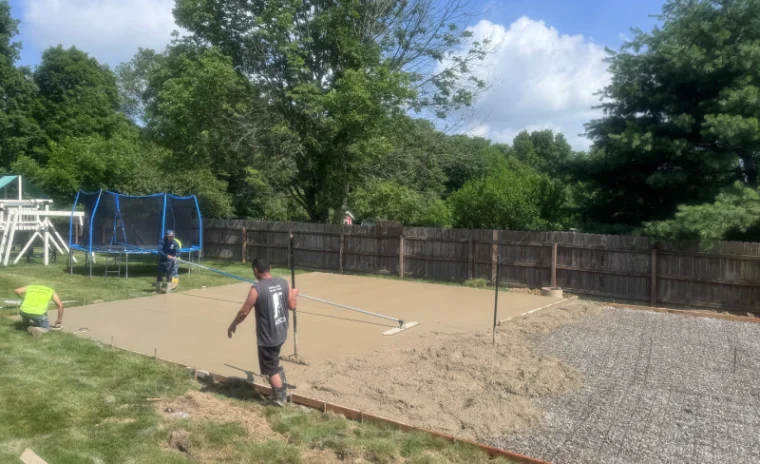
Immediately after pouring, strike off excess concrete using a straight 2×4 screed board that spans the width of your forms. Work the screed in a sawing motion while pulling it toward you, filling low spots with additional material as needed. This initial leveling creates a flat plane for subsequent finishing steps.
Allow surface water to evaporate before proceeding. Premature finishing traps bleed water beneath the surface, creating a weak layer prone to scaling and dusting. Once the sheen disappears, use a bull float to smooth the surface and embed aggregate slightly below the surface. For decorative concrete services or slip-resistant textures, apply a broom finish by dragging stiff bristles across the surface in straight, overlapping passes.
Edge the perimeter with a hand edger to create rounded corners that resist chipping. Cut control joints every eight to ten feet using a groover tool, establishing weak points where the slab can crack in a controlled, inconspicuous manner. Control joints should penetrate at least one-quarter of the slab depth.
Curing determines final strength and longevity. Concrete reaches only 50 percent of design strength in the first week, requiring consistent moisture to complete the hydration process. Cover the finished slab with plastic sheeting or apply a liquid curing compound within 30 minutes of finishing. Keep the surface moist for at least seven days, longer during hot or windy conditions. In Ohio’s variable climate, monitor overnight temperatures. If frost threatens during the first 48 hours, cover slabs with insulating blankets to prevent surface damage.
Avoid These Mistakes: When to Consider Professional Assistance
Even careful planning cannot prevent every issue. The most common mistakes include inadequate base preparation, incorrect water-to-cement ratios, and insufficient curing. Skipping the compaction step or using the wrong base material invites settling and cracking within the first year. Adding too much water creates a weaker slab with poor abrasion resistance and increased permeability. Failing to protect fresh concrete from temperature extremes results in surface defects that compromise appearance and durability.
Another frequent error involves misjudging project scope. Slabs exceeding 200 square feet, those requiring significant grading or drainage work, or projects involving stamped patterns and color require equipment and experience beyond typical DIY capability. Pole barn builders and commercial foundation work demand engineering calculations, proper reinforcement schedules, and inspection compliance that trained professionals handle routinely.
Recognize when your project benefits from professional input. Complex sites with poor drainage, steep slopes, or proximity to existing structures increase risk substantially. A concrete contractor brings specialized tools such as power trowels, laser levels, and concrete pumps that improve efficiency and finish quality. For concrete patio contractors or concrete sidewalk installations that integrate with existing hardscape, matching elevation, slope, and appearance requires an experienced eye.
If your project involves structural elements, decorative finishes, or falls outside your comfort zone, consulting with qualified professionals in Johnstown and surrounding areas ensures results that meet both aesthetic and performance standards. Contact local contractors to discuss your specific needs, obtain detailed estimates, and determine whether a DIY approach or professional installation best serves your timeline, budget, and long-term goals.